Watercolor Overlay Clipping Masks PNG: The Smart Creator's Guide
In the world of digital design, there is a distinct difference between an image that looks "done" and one that feels authentic. Many creators struggle to bridge the gap between crisp vector graphics and the organic, fluid beauty of traditional media. This is where Watercolor Overlay Clipping Masks PNG files become an essential tool in your arsenal. These assets allow you to infuse the warmth, texture, and unpredictability of watercolor paint into your digital projects without needing a physical brush or a sink full of water. Whether you are designing wedding invitations, marketing materials for Valentine's Day, or fine art compositions, understanding how to leverage these overlays correctly can elevate your work from generic to gallery-worthy.
Understanding the Power of Layered Textures
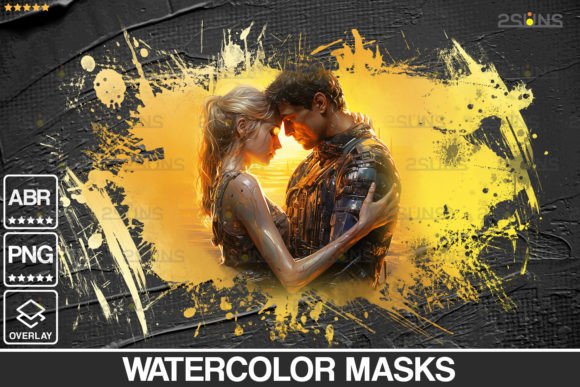
At its core, a Watercolor Overlay Clipping Mask PNG is a high-resolution transparent image designed to sit on top of other layers. When used with clipping masks in software like Photoshop, Illustrator, or Procreate, the texture adheres strictly to the shape of the layer beneath it. This means if you have a photo of a couple or a bold typography element, the watercolor wash appears only within those boundaries, creating a seamless blend of photography and painting.
The specific set we are discussing includes five unique PNG overlays, five ABR (Photoshop brush) files, and one 300 DPI JPEG reference. This combination offers versatility: the PNGs provide instant textures, while the ABR brushes allow you to paint custom strokes that mimic the same aesthetic. Because these files are compatible with any software that supports layers, they serve as a universal solution for freelancers, marketers, and hobbyists alike.
Common Pitfalls That Ruin Your Composition
Despite their utility, many users make critical errors when applying watercolor textures that result in a flat, amateurish appearance. The most frequent mistake is treating the overlay as a simple sticker rather than an integrated element. If you simply drop a Watercolor Photoshop overlay onto a background without adjusting blending modes or opacity, the result often looks pasted on and disconnected from the rest of the design.
Another overlooked detail is resolution mismatch. Using low-resolution textures on large-format prints can lead to pixelation that destroys the illusion of fine art. Since this specific collection provides 300 DPI files, it is optimized for print quality. However, if you stretch a smaller asset to fit a billboard or a large banner, the delicate grain of the watercolor will dissolve into blocky pixels, ruining the professional presentation.
Furthermore, beginners often ignore the color harmony of the overlay. Applying a cool-toned blue wash over a warm, golden-hour photograph without adjusting the hue can create visual dissonance. The texture might be beautiful on its own, but if it clashes with the underlying colors, it distracts the viewer rather than enhancing the mood. This is particularly important for themed projects like Valentine overlays, where the color palette needs to feel cohesive and romantic.
How to Avoid Quality Issues and Wasted Time
To ensure your designs look polished, you must approach the application process with intention. First, always verify the resolution of your base image before applying the texture. If your base photo is 72 DPI, adding a 300 DPI texture won't magically fix the underlying blur. Start with high-quality source material to match the fidelity of your Watercolor png brushes and overlays.
Secondly, master the use of blending modes. Instead of leaving the overlay on "Normal," experiment with "Multiply," "Overlay," or "Soft Light." These modes allow the white spaces of the PNG to remain transparent while letting the colored pigment interact naturally with the layer below. This technique creates depth and makes the texture appear as if it was painted directly onto the subject.
Third, utilize the included ABR brushes to add custom details. While the pre-made PNGs are excellent for broad coverage, using the brush files allows you to reinforce edges or add splashes of color that guide the eye. This hybrid approach—combining static overlays with dynamic brushwork—is what separates professional results from template-heavy designs.
Evaluating Assets Before You Commit
Before downloading or purchasing any texture pack, including this set of five PNGs and five brushes, take a moment to evaluate the file structure. Check that the PNGs have true transparency. Some free resources include a white background that requires tedious removal, whereas professional packs come ready to use. Additionally, ensure the JPEG preview accurately represents the texture at 100% zoom. Sometimes, previews are compressed, hiding noise or artifacts that become visible upon closer inspection.
Consider your workflow compatibility. While this set works across most major design platforms, confirm that your specific software version supports the ABR format if you plan to use the brushes. Older versions of some graphic applications may not recognize newer brush formats, leading to frustration during the creative process. Compatibility is key to maintaining efficiency, especially when deadlines are tight.
Practical Applications for Real-World Projects
The versatility of Watercolor Overlay Clipping Masks PNG extends far beyond simple decoration. For small business owners, these textures can transform product mockups into lifestyle images that evoke emotion. Imagine a jewelry brand using a soft pink watercolor mask over a ring photo; the result feels handcrafted and intimate, appealing directly to the customer's desire for uniqueness.
Marketers and bloggers can use these assets to break up walls of text or to highlight key statistics in infographics. By clipping a subtle texture to a number or a headline, you draw attention without overwhelming the reader. Educators can apply similar techniques to lesson plans or course materials, making learning aids visually engaging for adult students.
For fine art enthusiasts, the combination of high-resolution JPEG references and editable PNG layers opens the door to mixed-media experimentation. You can scan a physical sketch, import it into your digital workspace, and use the watercolor overlays to add color and dimension, effectively merging traditional and digital workflows.
Maximizing Value Through Strategic Use
Investing time in learning how to manipulate these overlays pays dividends in the long run. Rather than searching for a new texture for every project, a curated set like this one becomes a reliable foundation. The inclusion of both PNGs and ABR brushes ensures you have options for quick fixes and detailed customization. By avoiding common mistakes like poor blending or resolution issues, you protect your reputation and deliver work that stands the test of time.
Remember, the goal is not just to cover an image with color, but to enhance its narrative. Whether you are crafting a heartfelt Valentine's card or a corporate branding package, the right application of Watercolor Textures adds a human touch that resonates with audiences. Treat these digital tools with the same care you would give a physical palette, and your creations will reflect that dedication.